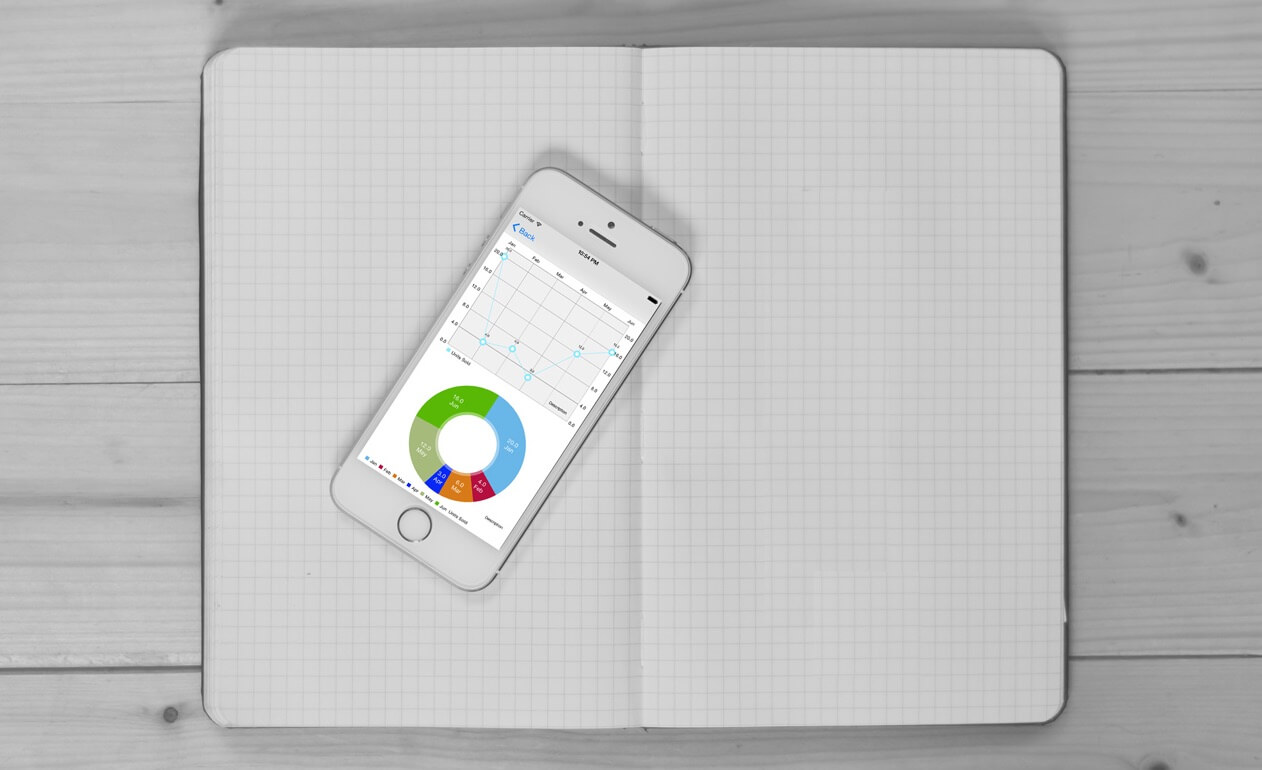
Using charts to display data can help users understand the information more easily than they would if it were presented in a table, especially when dealing with a lot of data. With charts, you can easily see patterns in the data at a glance as opposed to reading through a whole table (or several tables) to get this information. The use of charts has been a common feature in business and fitness apps.
In this article, we’ll look at how to add charts to your application using the ios-charts library by Daniel Cohen Gindi. ios-charts is an iOS port of the fairly popular Android library MPAndroidChart created by Philipp Jahoda. With this library, you can include various types of charts in your app fairly quickly and easily. With a few lines of code, you can have a fully working and interactive chart, that is highly customizable.
Core features of the library include:
- 8 different chart types
- Scaling on both axes (with touch-gesture, axes separately or pinch-zoom)
- Dragging / Panning (with touch-gesture)
- Combined-Charts (line-, bar-, scatter-, candle-stick-, bubble-)
- Dual (separate) Y-Axis
- Finger drawing (draw values into the chart with touch-gesture)
- Highlighting values (with customizeable popup-views)
- Multiple / Separate Axes
- Save chart to camera-roll / export to PNG/JPEG
- Predefined color templates
- Legends (generated automatically, customizable)
- Customizable Axes (both x- and y-axis)
- Animations (build up animations, on both x- and y-axis)
- Limit lines (providing additional information, maximums, e.t.c.)
- Fully customizable (paints, typefaces, legends, colors, background, gestures, dashed lines, e.t.c.)
filed under: course, intermediate, swift, tutorials tagged with: ios charts, ios programming, mpandroidchart, swift
A Beginner’s Guide to UIScrollView
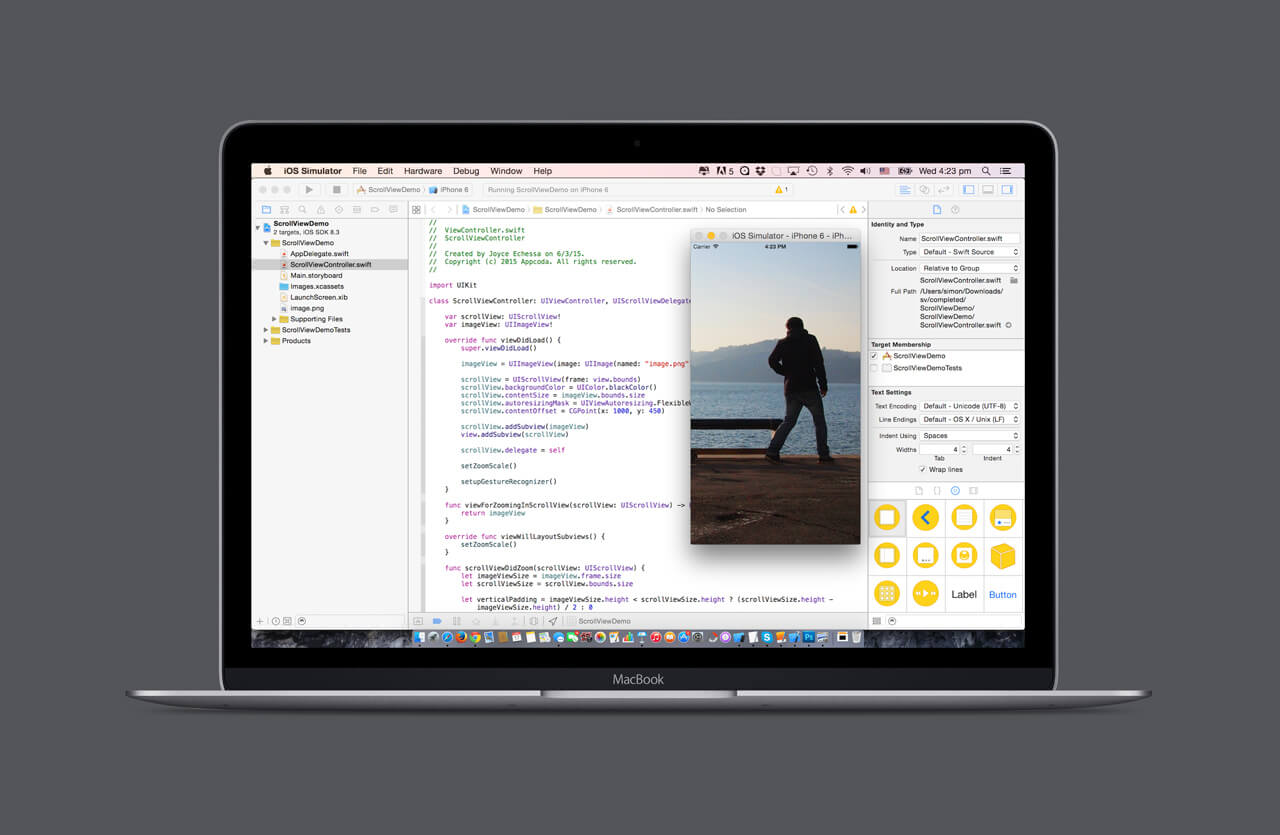
In iOS, scroll views are used to view content that won’t fit entirely on the screen. Scroll views have two main purposes:
- To let users drag the area of the content they want to display
- To let users zoom in to or out of the displayed content using the pinch gestures
A common control used in iOS apps – UITableView – is a subclass of UIScrollView and provides a great way to view content that is larger than the screen.
In this tutorial, we’ll look at various aspects of UIScrollView, specifically, creating a scroll view programmatically and in Interface Builder, scrolling and zooming, working with insets and nested scroll views.
Before reading on, first download the resource file for the project which contains files we’ll use in the tutorial.
filed under: beginner, course, swift, tutorials tagged with: ios programming, swift, uiscrollview
What’s New in Swift 2.0: A Brief Introduction
Editor’s note: This post is contributed by Maxime. He was recently awarded the WWDC scholarship to attend this year’s conference. We’re so happy to have him to share with us about the new features of Swift 2.
Update: We’ve published a beginner’s guide to Swift 2.
One year ago, Apple brought us Swift, a brand new programming language for both iOS and OS X. When it was first announced, just like other iOS developers, I was thrilled. Advertised as a fast and safe language, Swift has now grown to one of the most popular programming languages. As expected, the company introduced Swift 2 at WWDC this year. I am fortunate that I got an opportunity to attend the conference so I can share some updates on Swift.
We’re stepping on the gas this year with Swift 2. We think Swift is the next big programming language, the one we will all do application and systems programming on for 20 years to come. We think it should be everywhere and used by everyone.Craig Federighi, Apple’s senior vice president of Software Engineering
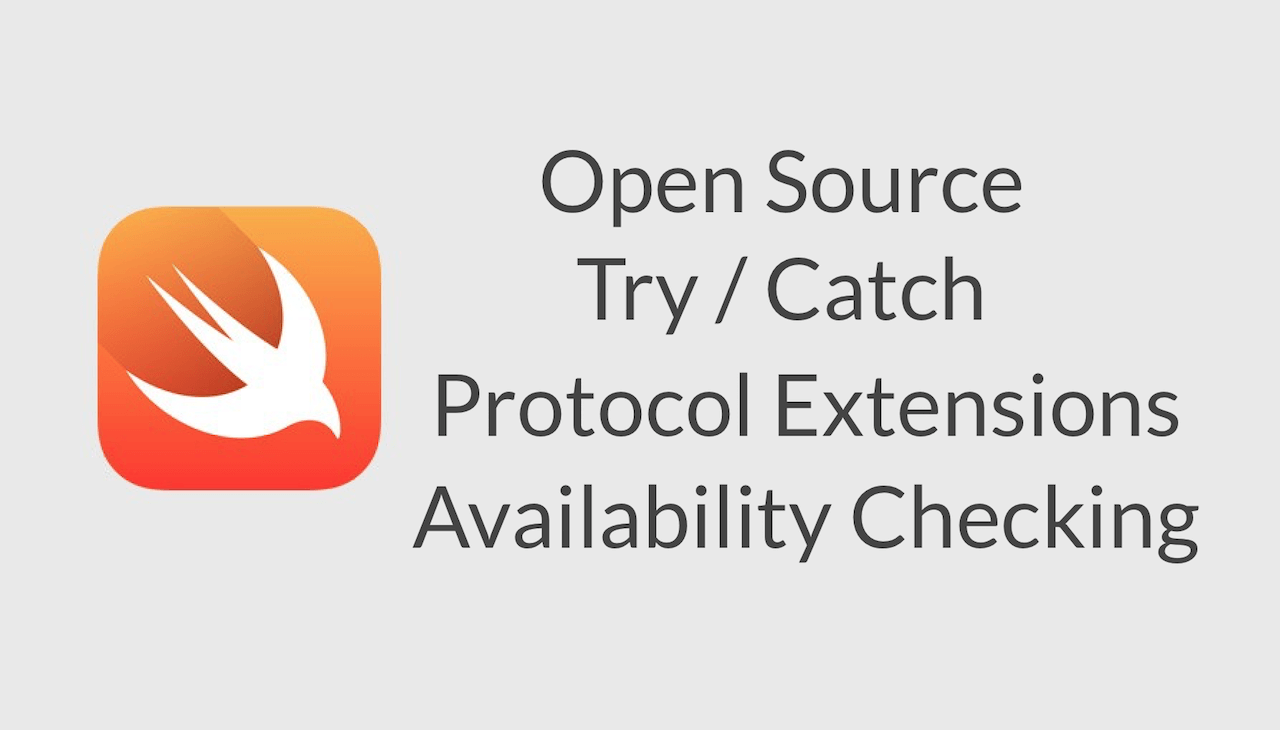
We measure temperature in Celsius or Fahrenheit scale. At WWDC, we measure the popularity of a new feature in decibel. The two biggest applauses this year were when Apple announced UI testing support in Xcode 7 and Swift goes Open Source. If you missed the WWDC keynote or have been living under a rock lately, you read it right: Swift goes open source. This is a huge deal. Later this year, Apple will release Swift’s source code to the public, including the compiler and standard libraries, under an OSI-compliant license. Apple will also port the source code to Linux. Developers will be able to contribute to the development of the language and write programs on Linux using Swift. In fact, you’re encouraged to contribute to the development of the language.
Along with this exciting news, Swift 2 includes some new features such as improved error handling, protocol extensions and availability check. Let me give you a brief overview of the updates.
Building a Custom Pull To Refresh Control for Your iOS Apps
In a world that there are extremely so many mobile applications, there is no doubt that it’s tremendously difficult to create new ones that will attract users’ attention and will make their way among all others up to the top successfully. Definitely, one could say that a secret ingredient that turns simple apps to outstanding apps is the customization touches that development teams (developers and designers) apply to small details that usually most programmers don’t deal with. One of them, as you assume from the tutorial’s title, is the pull-to-refresh control, and through this post I am about to show you the way to override its default appearance.
As you know, the pull-to-refresh control is the activity view indicator (often along with some short message) that appears on top of a tableview when data loading is in progress, and the tableview’s contents have not been refreshed yet. Actually, the pull-to-refresh control is something like a “Please, wait…” message shown to the users while they’re awaiting for new content to be fetched and displayed. The most well-known app that uses it is the Mail, where by dragging towards bottom the emails tableview leads to refreshing them. The debut of that control was made in iOS 6, and since then it has been used thousand times in countless applications.

If you have ever desired to use the pull-to-refresh control in any of your apps and you’ve searched around for information on how to do that, then you’ve definitely come across to the Simon’s tutorialthat perfectly explains all you need to know. In this post we are going to see another aspect of the pull-to-refresh though; how to create a custom one, so you can apply a different style to this small but important detail that will attach a different perspective to your apps.
So, finishing this quick prelude, in the next few parts you are going to see a technique that enables you to add any custom content and animation you want so you can “replace” the default pull-to-refresh control. Note that what you will see next is just to demonstrate the logic you should follow; the actual custom content it totally up to you, or more precisely, is up to your imagination. Let’s get started, and in a pretty short amount of time you’ll be able to create custom pull-to-refresh content!
filed under: course, intermediate, swift, tutorials tagged with: ios programming, pull-to-refresh, swift
A Beginner’s Guide to Presentation Controllers in iOS 8
Before the introduction of iOS 8 and specifically, Adaptive UI, whenever you wanted to display presentation sheets in a universal app, you had to make platform checks to verify whether the device the app was running on was an iPhone or an iPad to decide whether to present the sheet as a popover or to push a view onto the screen.
iOS 8 introduces presentation controllers which make the above unnecessary. Now you can write a single code path for your presentation, that works on all devices, adapting itself to the device size and orientation. You do this by specifying a preferred presentation style when presenting a view controller, for example a popover, and then according to the size class of your device, the OS will either present the view controller in that style or switch to an alternative style, for example a popover being presented as full screen on compact-width sizes.

In this article we’ll start off by looking at UIAlertController which replaces UIAlertView and UIActionSheet to present information to the user. We’ll then look at UIPopoverPresentationController which enables us to create adaptive presentation controllers without writing platform specific code. We’ll finish off by looking at how you can create your own custom presentation controllers. We have covered UIAlertController here on Appcoda before, so feel free to skip that part if you wish to.
filed under: beginner, course, swift, tutorials tagged with: ios programming, swift, uialertcontroller,uipopoverpresentationcontroller
A Beginner’s Guide to In-App Purchase Programming in iOS 8
Many applications today provide the option to get extra content and features by making purchases through them. This technique, known as In-App Purchases, has become a fashion during the last few years, and it has proven to be quite profitable and efficient. Undoubtably, we all have downloaded apps from App Store that gave us the option to get additional material by purchasing it through them.
It’s an undeniable fact that the most of the developers’ (and Apple’s of course) revenue the last couple of years is based on the In-App Purchases. And if we think a bit about it, why not? In-App Purchases (or in short IAP) consist of a great tool for developers, and of a nice option for users. With it, both sides can be happy; developers can sell their apps for free in the App Store with a few features enabled so they attract more users to try them, and integrate IAP for unlocking additional content after having purchased it. Users, on the other hand, can buy only the content or features they are interested in, without having to pay for parts of the app they don’t want to use. And as it has been proved, this strategy has increased the income for almost all developers that use IAP.

So, as you assume, in this tutorial I’m planning to show you how to integrate In-App Purchases in your apps. As you’ll see, doing so it’s not difficult, and the steps you have to follow are pretty much always the same. In short, here’s what it takes in order to integrate In-App Purchases into an iOS app:
- Perform some basic project configuration in Xcode.
- Create In-App Purchase product records in the iTunes Connect portal.
- Add specific code to get the IAP product info from Apple and perform payments.
Of course, we are going to see each one of the above steps in details in the following parts. However, before we do that, let me underline a few facts and concepts you should be aware of in advance. In the above list, I used the term “product“, and that wasn’t random. This term is also used by Apple when you deal with IAP, and additionally it represents what you sell inside your app. Every In-App Purchase product falls to one of the following categories, depending always on the app’s nature and the kind of the purchase:
- Consumable: This kind of product can be purchased multiple times, and not just once. For example, in a game a consumable product can be a number of extra lives for the main hero. Consumable products unlock app features just for a small period of time, and they don’t have permanent effect.
- Non-Consumable: This category is the exact opposite to the previous one, and as you understand the purchase of a non-consumable product is made just once. For example, buying extra fonts for a text-editing app must be done just one time, and the extra fonts must be available from there on and forever.
- Renewable Subscriptions: You can guess based on its name what this product kind is for. With this, the purchase must be renewed from time to time (the interval can be specified in the iTunes Connect), and it’s suitable in cases you sell a service that requires a subscription.
- Non-Renewable Subscriptions: On the contrary to the previous case, a non-renewable subscription lasts one time only and expires. It’s useful in cases the provided service doesn’t require a new subscription, and it’s going to end after a period of time.
Besides all the above, you should always keep in mind the proper way to test In-App Purchases while you are still in the development stage. That means that you should never user a real Apple ID and never pay with real money for the services or products you’re still building. Thankfully, you can work in a sandboxed mode by creating and using test users in the iTunes Connect platform throughout the development period. That way you can perform extensive testings on your In-App Purchases without paying even a cent.
Lastly, get prepared to test the demo app of this tutorial (and every app of yours that will integrate IAP) in a real device. You can’t make purchases using the Simulator, even though you can get the IAP product details and display them in the app.
filed under: beginner, course, swift, tutorials tagged with: in-app purchase, ios programming, itunes connect portal, swift
Core Data Basics: Preload Data and Use Existing SQLite Database
Editor’s note: This is a sample chapter of our new book, Intermediate iOS 8 Programming with Swift.
When working with Core Data, you may have asked these two questions:
- How can you preload existing data into the SQLite database?
- How can you use an existing SQLite database in my Xcode project?
I recently met a friend who is now working on a dictionary app for a particular industry. He got the same questions. He knows how to save data into the database and retrieve them back from the Core Data store. The real question is: how could he preload the existing dictionary data into the database?
I believe some of you may have the same question. This is why I devote this tutorial to talk about data preloading in Core Data. I will answer the above questions and show you how to preload your app with existing data.

So how can you preload existing data into the built-in SQLite database of your app? In general you bundle a data file (in CSV or JSON format or whatever format you like). When the user launches the app for the very first time, it preloads the data from the data file and puts them into the database. At the time when the app is fully launched, it will be able to use the database, which has been pre-filled with data. The data file can be either bundled in the app or hosted on a cloud server. By storing the file in the cloud or other external sources, this would allow you to update the data easily, without rebuilding the app. I will walk you through both approaches by building a simple demo app.
Once you understand how data preloading works, I will show you how to use an existing SQLite database (again pre-filled with data) in your app.
[Read more…]
[Read more…]
filed under: course, intermediate, swift, tutorials tagged with: core data, ios programming, sqlite, swift, xcode 6
How to Use Dropbox API in iOS Apps
Finding integrated cloud services into an iOS application some time ago was something quite rare. There were not many services offering APIs to do that, and moreover just a small percentage out of the total users had a constant Internet connection (3G/4G connections, or constant access to Wifi networks). Nowadays things have dramatically changed, as technology has improved significantly and all the previous problems have been overcome. So, implementing cloud-related features in applications is now a common task, and users expect to see such features more and more to existing and new applications.
Not so long time ago I had written a tutorial about the CloudKit, the cloud solution provided by Apple. This time, I am going to present you another API that it can be used for dealing with files in the cloud, and this is not other than the Dropbox API. I really doubt if there’s even one computer or mobile device user that hasn’t heard of the Dropbox, a well-known platform allowing to keep files on the cloud. If you are not a Dropbox user, then it’s a good chance to give it a try now, as it consists of a good option for having files online, share them with other people and do even more tasks. Dropbox can be used directly in the web by using a browser, by installing a desktop application to the computer, or as a mobile app.
So, through the upcoming parts of this tutorial we’ll see how the Dropbox can be integrated into an iOS app, and how files can be uploaded and downloaded simply by making use of a framework provided by the Dropbox to developers. As you understand, having a Dropbox account is a prerequisite so you can continue in this tutorial, and if you don’t have one, it’s time to create it. It would also be good to be familiarised with it, but as it’s easy to use it, it’s not required.
As you’ll see next, before you’ll be able to write even the first line of code regarding Dropbox, certain preliminary steps are required to be done. I won’t dive into a lot of details now, as we’ll see them right next. In short, two things are required: To download the Dropbox SDK from the Dropbox website (actually from a special Dropbox website dedicated to developers), and to create an app record to a web platform so you get some unique keys that will enable the mobile app to get connected to Dropbox.
There are two options when creating that app record to the Dropbox platform. You can either select to allow access to the whole Dropbox folder, or to create a special folder that will be used by your application only. That folder will be the root for the app. In this tutorial we’ll choose the second option, but generally what you will select depends on what your app is supposed to do.
[Read more…]
[Read more…]
filed under: course, intermediate, swift, tutorials
Building a QR Code Generator with Core Image Filters
One of the first tutorials I contributed here at Appcoda was a guide about how to create a QR code reader in iOS. At that time of course, the code of that tutorial was written in Objective-C, as Swift wasn’t still existing. Later in time, my friend Simon wrote a new one, this time made entirely in Swift for all the fans of this new language. By the time that the first post regarding this topic was published here, QR codes had already started to be used more and more for advertising and marketing reasons, and many developers were dropped in the battle for making their own QR code readers. Today QR codes exist almost everywhere; in magazines and newspapers, in television, in printed in T-shirts, in advertising labels, in websites, etc. The list is long. On the other hand, the QR code reading applications existing in the AppStore are also endless. So, as you understand, QR codes consist of an interesting part for both advertisers and developers (and not only), as it’s something new and easily manageable.
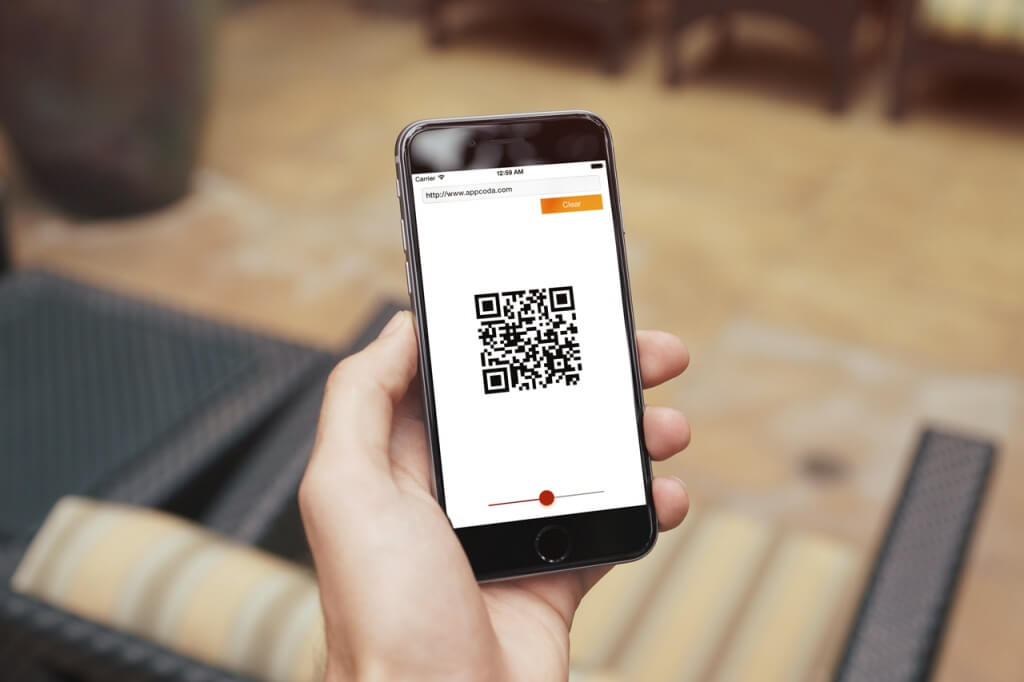
With this tutorial I’m returning back to the discussion about QR Codes after a long time and many tutorials in between since that first QR code-related tutorial, but this time with a completely different goal. My intension is not to talk once again about QR Code readers; after all, we have already such tutorials here (see the links above). This time my goal is to show you how to make a QR code generator. And trust me, as you’ll see, it’s as easy as making a QR code reader (even easier). But first, let me tell you a few things you should know about.
Prior to iOS 7, making a QR code generator was a real trouble. Not many resources existed back then, and most developers had to avoid creating their custom code; the easiest thing to do was to pick among 2-3 different existing libraries and fit it to their applications. But thankfully, all that is now history. By introducing iOS 7 time ago, Apple also turned any task related to QR codes (reading and generating) into a piece of cake. For reading QR codes, the AVFoundation framework is now the tool every developer needs. For generating, the only thing coders have to do is to use the Core Imageframework, and more specifically the Core Image filters.
filed under: course, intermediate, swift, tutorials tagged with: core image, ios programming, qr code, swift
Introduction to React Native: Building iOS Apps with JavaScript
A few weeks ago Facebook open sourced React Native which is a framework that lets you build native iOS and Android (at the moment Android support is still under development) applications with JavaScript.
We’ve seen frameworks like Titanium and PhoneGap which offer developers an option of building mobile applications using web technologies. This is an advantage as they enable developers to use one set of skills for web and mobile development. Not only that, but the same code base could be used with little modification for multiple platforms – what became known as “Write once, run everywhere”. However these frameworks fall short when it comes to the performance of the apps that are built with them, so as much as they offer some attractive features, it has always been preferred to build native applications.
React Native is different from those types of frameworks. While a framework like PhoneGap works by wrapping web content in a WebView resulting in UI elements that don’t quite have a native feel to them, React native uses JavaScript components backed by native iOS or Android components so the app you build is fully native.
React Native is not a “Write once, run everywhere” frameworks, as Facebook’s Tom Occhino says in the video linked to at the end of the article. As you will see in the tutorial, you build the UI using components that are specific to the platform, so you can’t take the same code and run it in Android. What React Native enables you to do is learn one set of skills and use it to build for multiple platforms, as Occhino goes further to say it is a “Learn once, write anywhere” framework. This tutorial will introduce you to React Native development by going through the process of building a simple app with the framework.
About Divya
This is a short description in the author block about the author. You edit it by entering text in the "Biographical Info" field in the user admin panel.
0 comments:
Post a Comment